Software > OpenVMS Systems > Documentation > 82final > 6297 HP OpenVMS Systems Documentation |
HP COBOL
|
| Previous | Contents | Index |
The following example illustrates the UPON phrase used in conjunction with DISPLAY:
SPECIAL-NAMES.
    LINE-PRINTER IS ERROR-LOG
    .
    .
    .
PROCEDURE DIVISION.
    .
    .
    .
    DISPLAY ERROR-COUNT, "  phase 2 errors, ", ERROR-MSG UPON ERROR-LOG.
|
The extended HP COBOL options to the ACCEPT and DISPLAY statements provide video forms features. You can develop video forms on VT100 and later series terminals and faithful emulators and write your application without regard to the type of terminal on which the application will eventually run. You can also run your forms application in the terminal emulator window of a workstation. 1
Using the extended forms of the ACCEPT and DISPLAY statements, you can design video forms to:
Figure 11-1 is a sample form created by an HP COBOL program. It is for entry of employee information into a master file. This program prompts the user to type in data. Then the program writes it to the master file and displays a new form.
Figure 11-1 Video Form to Gather Information for a Master File Record

The final appearance of screens depends upon the setting of your system display setup properties (for example, dark on light, or light on dark). The following figures are representative only. |
For information on differences between the HP COBOL and the HP COBOL for OpenVMS VAX implementations of screen management, see Appendix B. For complete reference information on the ACCEPT and DISPLAY statements, including syntax, refer to the HP COBOL Reference Manual.
Designing Your Form with ACCEPT and DISPLAY Options
When you design a video form, you can use the ACCEPT and DISPLAY options to do the following:
The remainder of this chapter describes these topics.
To clear part or all of your screen before you accept or display data, you can use one of the following ERASE options of the ACCEPT and DISPLAY statements:
These options all work with either absolute or relative cursor positioning. (See Section 11.2.2.)
On OpenVMS, for any application that displays or accepts information from a terminal, use the SET TERMINAL/NOBROADCAST command before you start the application. This command prevents broadcast messages (such as notifications of new mail) from interrupting the screen displays. <> |
In Example 11-1, an introductory message is first displayed on the screen (along with a prompt to the user). Then the ERASE SCREEN option causes the entire screen to be erased before "Employee number:" is displayed. Figure 11-2 shows how the screen looks after the ERASE statement executes.
| Example 11-1 Erasing a Screen |
|---|
IDENTIFICATION DIVISION.
PROGRAM-ID.  ERASEIT.
DATA DIVISION.
WORKING-STORAGE SECTION.
01 ANY-CHAR             PIC X.
PROCEDURE DIVISION.
A00-BEGIN.
    DISPLAY "EMPLOYEE ACCESS SYSTEM" LINE 8 COLUMN 30.
    DISPLAY "Type any character to begin." LINE 20 COLUMN 10.
    ACCEPT ANY-CHAR.
A10-EN-SCREEN.
    DISPLAY "Employee number:" LINE 4 COLUMN 4 ERASE SCREEN.
    DISPLAY " " LINE 23 COLUMN 1.
    STOP RUN.
|
Figure 11-2 Screen After the ERASE Statement Executes

To position data items at a specified line and column, use the LINE NUMBER and COLUMN NUMBER phrases. You can use these phrases with both the ACCEPT and DISPLAY statements. You can use literals or numeric data items to specify line and column numbers.
The default initial cursor position is in the upper left corner of the screen. HP COBOL moves the cursor to this initial position just prior to the execution of the first ACCEPT or DISPLAY statement. This is true regardless of the format of the statement, unless you specify the cursor position. |
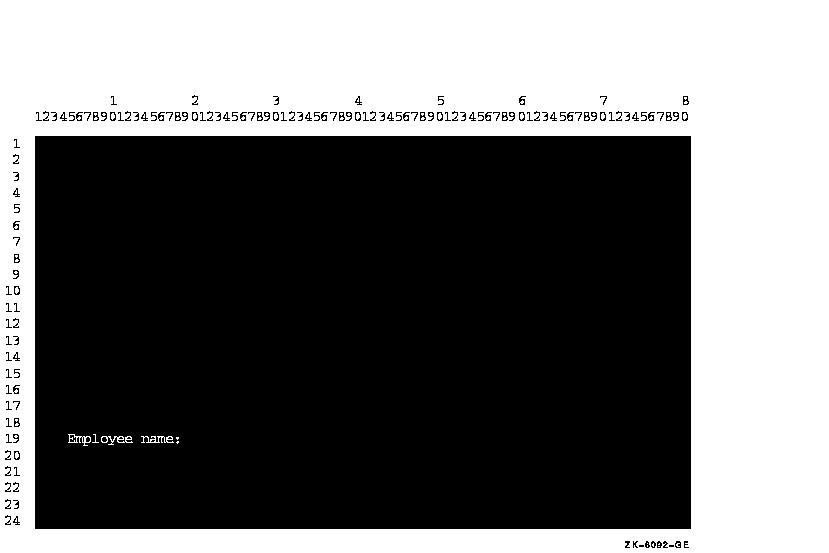
In Example 11-2 and in Figure 11-3, "Employee name:" is displayed on line 19 starting in column 4.
| Example 11-2 Cursor Positioning |
|---|
IDENTIFICATION DIVISION.
PROGRAM-ID.  LOCATE.
ENVIRONMENT DIVISION.
DATA DIVISION.
WORKING-STORAGE SECTION.
01 COL-NUM              PIC 99   VALUE 4.
PROCEDURE DIVISION.
A00-OUT-PARA.
    DISPLAY "Employee name:"     LINE 19
                                 COLUMN COL-NUM
                                 ERASE SCREEN.
    DISPLAY " " LINE 24
                COLUMN 1.
    STOP RUN.
|
Figure 11-3 Positioning the Data on Line 19, Column 5
If you use LINE, but not COLUMN, data is accepted or displayed at column 1 of the specified line position.
If you use COLUMN, but not LINE, data is accepted or displayed at the current line and specified column position.
If you do not use either phrase, data is accepted or displayed at the position specified by the rules for Format 1 ACCEPT and DISPLAY in the HP COBOL Reference Manual.
The presence of either or both the LINE and COLUMN phrases implies NO ADVANCING. |
You can use the PLUS option with the LINE or COLUMN phrases for relative cursor positioning. The PLUS option eliminates the need for counting lines or columns. Cursor positioning is relative to where the cursor is after the previous ACCEPT or DISPLAY. If you use the PLUS option without an integer, PLUS 1 is implied.
To get predictable results from your relative cursor positioning statements, do not:
In Example 11-3, the PLUS phrase is used twice to show relative positioning, once with an integer, and once without. Figure 11-4 shows the results.
| Example 11-3 Using PLUS for Cursor Positioning |
|---|
IDENTIFICATION DIVISION.
PROGRAM-ID. LINEPLUS.
PROCEDURE DIVISION.
A00-BEGIN.
    DISPLAY "Positioning Test" LINE 10      COLUMN 20 ERASE SCREEN
            "Changing Test"    LINE PLUS 5  COLUMN PLUS 26
            "Adding Test"      LINE PLUS    COLUMN PLUS 14.
    DISPLAY " " LINE 23 COLUMN 1.
    STOP RUN.
|
If you use the LINE PLUS phrase so relative positioning goes beyond the bottom of the screen, your form scrolls with each such display. |
Figure 11-4 Cursor Positioning Using the PLUS Option

1 HP COBOL does not provide mouse or split screen support. |
| Previous | Next | Contents | Index |