Software > OpenVMS Systems > Documentation > 83final > 6552 HP OpenVMS Systems Documentation |
HP OpenVMS Availability Manager User's Guide
Chapter 6
|
Performing certain fixes can have serious repercussions, including possible system failure. Therefore, only experienced system managers should perform fixes. |
When you suspect or detect a resource availability problem, in many cases you can use the Availability Manager to analyze the problem and to perform a fix to improve the situation.
Availability Manager fixes fall into these categories:
You can access fixes, by category, from the pages listed in Table 6-1.
| Fix Category and Name | Available from This Page |
|---|---|
Node fixes:
Crash Node |
Node Summary
CPU Memory Summary I/O Process SCA Port SCA Circuit LAN Virtual Circuit LAN Path (Channel) LAN Device |
Process fixes:
General process fixes:Delete Process |
All of the process fixes are available from the following pages:
Memory Summary |
| Cluster interconnect fixes: | These fixes are available from the following lines of data on the Cluster Summary page (Figure 4-1): |
| - SCA Port:/ Adjust Priority | Right-click a data item on the Local Port Data display line to display a menu. Then select Port Fix.... |
| - SCA Circuit:/ Adjust Priority | Right-click a data item on the Circuits Data display line to display a menu. Then select Circuit Fix.... |
LAN Virtual Circuit Summary:
Maximum Transmit Window Size |
Right-click a data item on the LAN Virtual Circuit Summary line to display a menu. Then select VC LAN Fix.... Alternatively, you can use the Fix menu on the LAN VC Details page. |
LAN Path (Channel) Summary:
Adjust Priority |
Right-click a data item on the LAN Path (Channel) Summary line to display a menu. Then select Fixes.... Alternatively, you can use the Fix menu on the Channel Details page. |
LAN Device Details:
Adjust Priority |
You can access these fixes in the following ways:
|
Table 6-2 summarizes various problems, recommended fixes, and the expected results of fixes.
| Problem | Fix | Result |
|---|---|---|
| Node resource hanging cluster | Crash Node | Node fails with operator-requested shutdown. See Section 6.2.2 for the crash dump footprint for this type of shutdown. |
| Cluster hung | Adjust Quorum | Quorum for cluster is adjusted. |
| Process looping, intruder | Delete Process | Process no longer exists. |
| Endless process loop in same PC range | Exit Image | Exits from current image. |
| Runaway process, unwelcome intruder | Suspend Process | Process is suspended from execution. |
| Process previously suspended | Resume Process | Process starts from point it was suspended. |
| Runaway process or process that is overconsuming | Process Priority | Base priority changes to selected setting. |
| Low node memory | Purge Working Set (WS) | Frees memory on node; page faulting might occur for process affected. |
| Working set too high or low | Adjust Working Set (WS) | Removes unused pages from working set; page faulting might occur. |
| Process quota has reached its limit and has entered RWAIT state | Adjust Process Limits | Process limit is increased, which in many cases frees the process to continue execution. |
| Process has exhausted its pagefile quota | Adjust Pagefile Quota | Pagefile quota limit of the process is adjusted. |
Most process fixes correspond to an OpenVMS system service call, as shown in the following table:
| Process Fix | System Service Call |
|---|---|
| Delete Process | $DELPRC |
| Exit Image | $FORCEX |
| Suspend Process | $SUSPND |
| Resume Process | $RESUME |
| Process Priority | $SETPRI |
| Purge Working Set (WS) | $PURGWS |
| Adjust Working Set (WS) | $ADJWSL |
Adjust process limits of the following:
Direct I/O (DIO) |
None |
Each fix that uses a system service call requires that the process execute the system service. A hung process has the fix queued to it, and the fix does not execute until the process is operational again. |
Be aware of the following facts before you perform a fix:
Standard OpenVMS privileges restrict users' write access. When you run the Data Analyzer, you must have the CMKRNL privilege to send a write (fix) instruction to a node with a problem.
The following options are displayed at the bottom of all fix pages:
| Option | Description |
|---|---|
| OK | Applies the fix and then exits the page. Any message associated with the fix is displayed in the Event pane. |
| Cancel | Cancels the fix. |
| Apply | Applies the fix and does not exit the page. Any message associated with the fix is displayed in the Return Status section of the page and in the Event pane. |
The following sections explain how to perform node fixes and process fixes.
One node fix has the special ability among Availability Manager fixes to allow you to deliberately fail (or crash) a node. Another node fix allows you to adjust cluster quorum.
To perform a node fix, follow these steps:
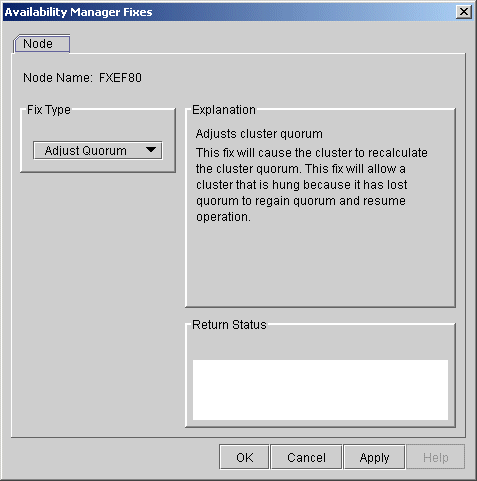
The Adjust Quorum fix is useful when the number of votes in a cluster falls below the quorum set for that cluster. This fix allows you to readjust the quorum so that it corresponds to the current number of votes in the cluster.
The Adjust Quorum page is shown in Figure 6-1.
Figure 6-1 Adjust Quorum
The Crash Node fix is an operator-requested bugcheck from the driver. It takes place as soon as you click OK in the Crash Node fix. After you perform this fix, the node cannot be restored to its previous state. After a crash, the node must be rebooted. |
When you select the Crash Node option, the Availability Manager displays the Crash Node page, shown in Figure 6-2.
Figure 6-2 Crash Node
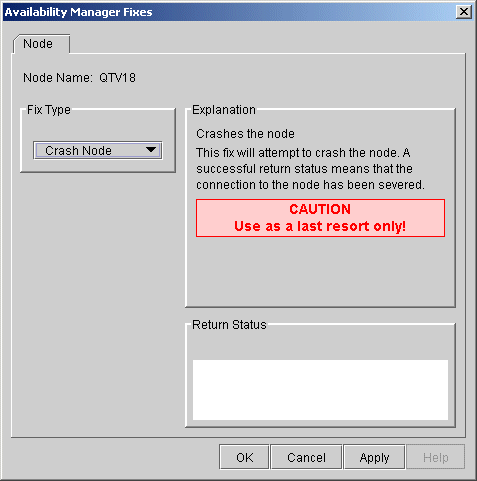
Because the node cannot report a confirmation when a Crash Node fix is successful, the crash success message is displayed after the timeout period for the fix confirmation has expired. |
Recognizing a System Failure Forced by the Availability Manager
Because a user with suitable privileges can force a node to fail from the Data Analyzer by using the Crash Node fix, system managers have requested a method for recognizing these particular failure footprints so that they can distinguish them from other failures. These failures all have identical footprints: they are operator-induced system failures in kernel mode at IPL 8. The top of the kernel stack is similar the following display:
                SP => Quadword system address
                      Quadword data
                      1BE0DEAD.00000000
                      00000000.00000000
                      Quadword data            TRAP$CRASH
                      Quadword data            SYS$RMDRIVER + offset
|
To perform a process fix, follow these steps:
Process General
Process Memory
Process Limits
Figure 6-3 Process General Options
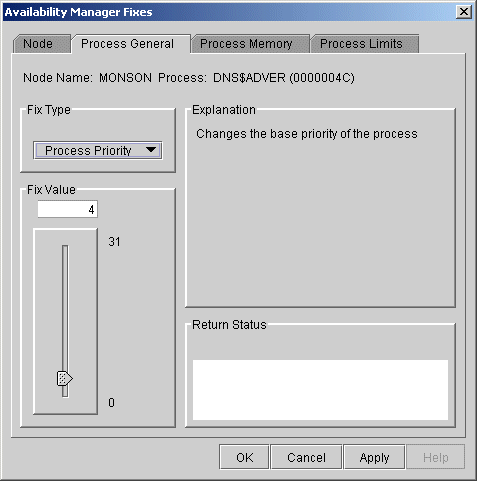
Some of the fixes, such as Process Priority, require you to use a slider to change the default value. When you finish setting a new process priority, click Apply at the bottom of the page to apply that fix.
In most cases, a Delete Process fix deletes a process. However, if a process is waiting for disk I/O or is in a resource wait state (RWAST), this fix might not delete the process. In this situation, it is useless to repeat the fix. Instead, depending on the resource the process is waiting for, a Process Limit fix might free the process. As a last resort, reboot the node to delete the process.
Deleting a system process can cause the system to hang or become unstable. |
When you select the Delete Process option, the Availability Manager displays the page shown in Figure 6-4.
Figure 6-4 Delete Process
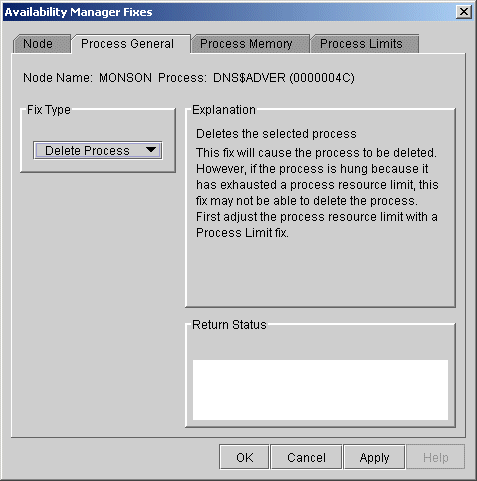
After reading the explanation, click Apply at the bottom of the page to apply the fix. A message displayed on the page indicates that the fix has been successful.
Exiting an image on a system process could cause the system to hang or become unstable. |
When you select the Exit Image option, the Availability Manager displays the page shown in Figure 6-5.
Figure 6-5 Exit Image Page
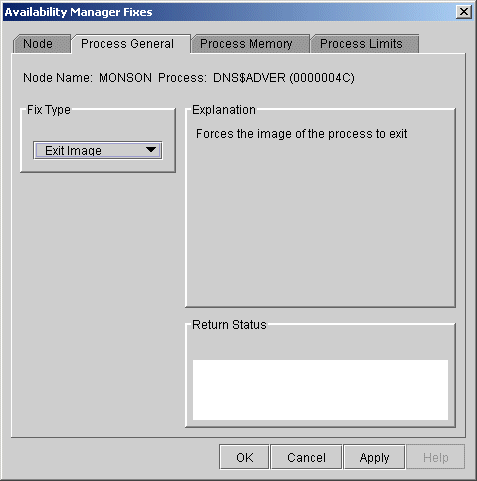
After reading the explanation in the page, click Apply at the bottom of the page to apply the fix. A message displayed on the page indicates that the fix has been successful.
Do not suspend system processes, especially JOB_CONTROL, because this might make your system unusable. (For more information, see HP OpenVMS Programming Concepts Manual, Volume I.) |
When you select the Suspend Process option, the Availability Manager displays the page shown in Figure 6-6.
Figure 6-6 Suspend Process
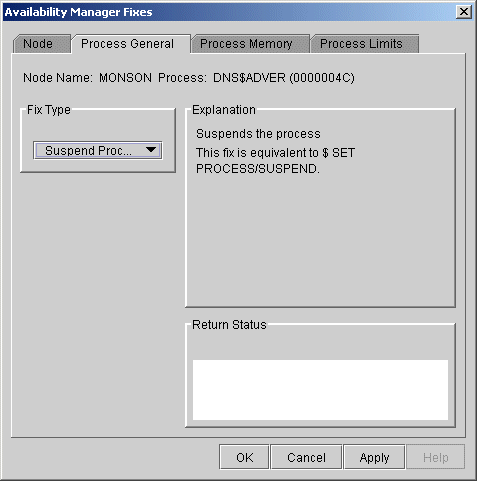
After reading the explanation, click Apply at the bottom of the page to apply the fix. A message displayed on the page indicates that the fix has been successful.
When you select the Resume Process option, the Availability Manager displays the page shown in Figure 6-7.
Figure 6-7 Resume Process
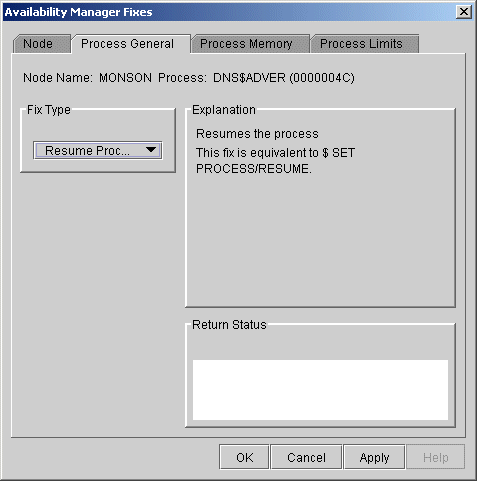
After reading the explanation, click Apply at the bottom of the page to apply the fix. A message displayed on the page indicates that the fix has been successful.
When you select the Process Priority option, the Availability Manager displays the page shown in Figure 6-8.
Figure 6-8 Process Priority
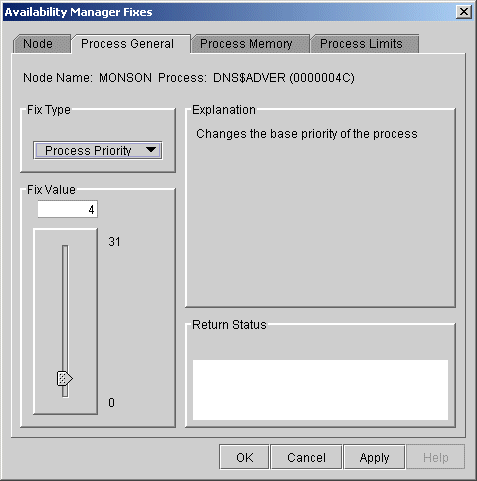
To change the base priority for a process, drag the slider on the scale to the number you want. The current priority number is displayed in a small box above the slider. You can also click the line above or below the slider to adjust the number by 1.
When you are satisfied with the new base priority, click Apply at the bottom of the page to apply the fix. A message displayed on the page indicates that the fix has been successful.
This fix purges the working set to a minimal size. You can use this fix to reclaim a process's pages that are not in active use. If the process is in a wait state, the working set remains at a minimal size, and the purged pages become available for other uses. If the process becomes active, pages the process needs are page-faulted back into memory, and the unneeded pages are available for other uses.
Be careful not to repeat this fix too often: a process that continually reclaims needed pages can cause excessive page faulting, which can affect system performance.
When you select the Purge Working Set option, the Availability Manager displays the page shown in Figure 6-9.
Figure 6-9 Purge Working Set
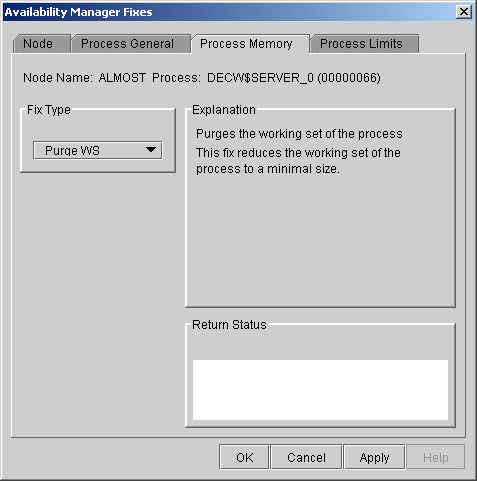
After reading the explanation on the page, click Apply at the bottom of the page to apply the fix. A message displayed on the page indicates that the fix has been successful.
If the automatic working set adjustment is enabled for the system, a fix to adjust the working set size disables the automatic adjustment for the process. For more information, see OpenVMS online help for SET WORKING_SET/ADJUST, which includes /NOADJUST. |
When you select the Adjust Working Set fix, the Availability Manager displays the page shown in Figure 6-10.
Figure 6-10 Adjust Working Set
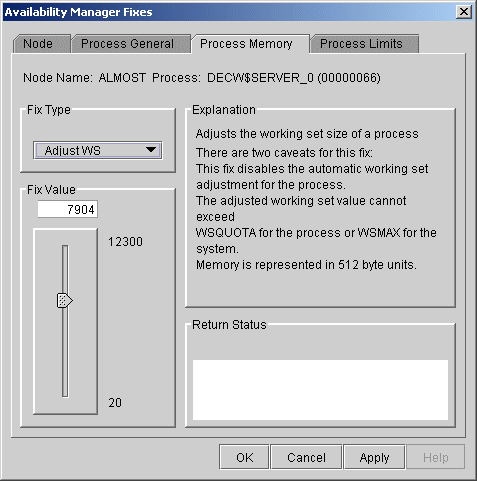
To perform this fix, use the slider to adjust the working set to the limit you want. You can also click the line above or below the slider to adjust the number by 1.
When you are satisfied with the new working set limit, click Apply at the bottom of the page to apply the fix. A message displayed on the page indicates that the fix has been successful.
| Previous | Next | Contents | Index |