If
you do not have access to HP SIM, you can use vMedia independently,
as described in this section. If you have several Integrity servers
connected by a high-speed network, you can use vMedia from a central
location to perform the installation or upgrades on the servers (one
at a time). You can use vMedia on a wider variety of Integrity servers.
For a list of the supported servers, see Section D.2.1.
The vMedia functionality provides virtual devices
that mimic physical hardware devices. For example, it can provide
you with a virtual CD/DVD drive that connects over the network to
your Integrity servers just as if being physically connected. For
maximum performance, HP recommends using image files stored on a hard
drive of your management station PC or Windows server or on a network
drive accessible through a high-speed network link. You can use vMedia
for initial system installation on a system without a built-in DVD
or for remote installation on a system physically located elsewhere. Unlike HP SIM provisioning, which automatically
installs OpenVMS and provides defaults for the various installation
options, with vMedia installations independent of HP SIM, you perform
installations interactively, determining the values of choice for
each option or prompt.
vMedia also allows the installation of layered products, either
remotely or on systems without a built-in DVD drive. The connected
virtual device is not limited to installation or upgrade purposes.
You can access the virtual device while OpenVMS is running. For example,
you can use vMedia to install and enable layered products.
NOTE: DVDs are accessible by vMedia as read only.
The vMedia device is the first in a series of
virtual-disk capabilities included in the current generation of MP
hardware. vMedia consists of two primary components:
On the Integrity servers
where OpenVMS is to be installed or upgraded: iLO 2 MP firmware that
emulates a USB DVD and streams the vMedia data across a live network
connection between the remote management console and the Integrity
server.
On the management workstation
(the remote x86 PC or Windows server from where you will browse to
connect to the Integrity servers iLO 2 MP): Java code that provides
data to the iLO 2 MP firmware as requested.
D.2.1 Prerequisites for Using vMedia to Install or Upgrade OpenVMS
The
vMedia functionality is included with the iLO 2 MP. OpenVMS supports
the use of vMedia with the HP Integrity rx2660, rx3600, rx6600, rx7620,
rx7640, rx8620, and rx8640 servers and with the Integrity BL860c and
BL870c Server Blade products. Using vMedia requires the following:
On Integrity servers:
On Integrity rx2660, rx3600,
and rx6600 servers, vMedia licensing through the Advanced Server Management
option (iLO 2 Advanced Pack) and the user virtual media access right.
vMedia is part of the iLO Advanced Pack feature set. This license
is provided and pre-enabled on the Integrity BL860c and BL870c Server
Blade products and on the supported cell-based servers (rx7640, rx8640,
and Superdomes with the sx2000 chipset).
On the supported cell-based
servers, HP Lights Out Advanced/KVM card (AD370A).
On Windows-based PC or
server from which you browse to the iLO 2 MP:
Microsoft Internet Explorer
Version 6 or later
Java Plug-in 1.4.2_10
or later.
The vMedia Java applet
has only been tested on x86 PCs and Windows servers.
An ISO image of the OpenVMS
Integrity servers OE DVD stored on a local disk or a network drive
accessible through a high-speed link. To create the ISO image, you
can use ILO 2 MP through your browser, as described in Section D.1.4. HP recommends that
you do not use vMedia to install or upgrade directly from a DVD on
the management workstation.
NOTE: When using vMedia to install or upgrade OpenVMS,
HP recommends using an image of the OpenVMS Integrity servers OE DVD
located on your Windows-based PC or server. This has two advantages:
If the DVD is defective or corrupted, the imaging
software will fail when you attempt to create an image of it, thereby
indicating the DVD's condition.
Installing or upgrading OpenVMS from the image file
is much faster than installing from a DVD. This advantage outweighs
any extra cost or time of copying the DVD to the ISO image file.
If your Integrity servers has a local DVD drive,
install or upgrade from the OpenVMS for Integrity servers OE DVD inserted
in the DVD drive on your Integrity servers instead of using vMedia
from your Windows-based management workstation. In short, for best
performance with installations or upgrades, choose from the following,
listed according to the potential speed (from fastest to slowest):
If your Integrity server
has a local DVD drive, install or upgrade using the OpenVMS for Integrity
servers OE DVD from that DVD drive instead of using vMedia from your
Windows-based system.
Install or upgrade using
an ISO image of the OpenVMS for Integrity servers OE DVD, where the
image is stored on your Windows-based management workstation.
Slowest, and not recommended
unless you have no other recourse, install or upgrade from a DVD drive
on your Windows-based management workstation.
D.2.2 Using vMedia to Install or Upgrade OpenVMS
To use vMedia to install or upgrade OpenVMS on
Integrity servers, perform these steps.
NOTE: Contents of screens shown in this section may vary according
to the type of browser software being used.
Insert the OpenVMS OE DVD
into the DVD drive of your PC or Windows server.
Make sure your Integrity servers
iLO 2 MP and vMedia are set up as documented in your Integrity servers
hardware documentation (for example, see the HP Integrity
iLO 2 MP Operations Guide). Enable the right to use the
vMedia applet.
Make sure your Integrity
server is powered on. Once you connect to your server's iLO 2
MP and log in, you can check the status and power on your Integrity
server from your browser. Select the Virtual Devices tab and access
the Power & Reset screen by selecting Power Management (on the
left of the screen).
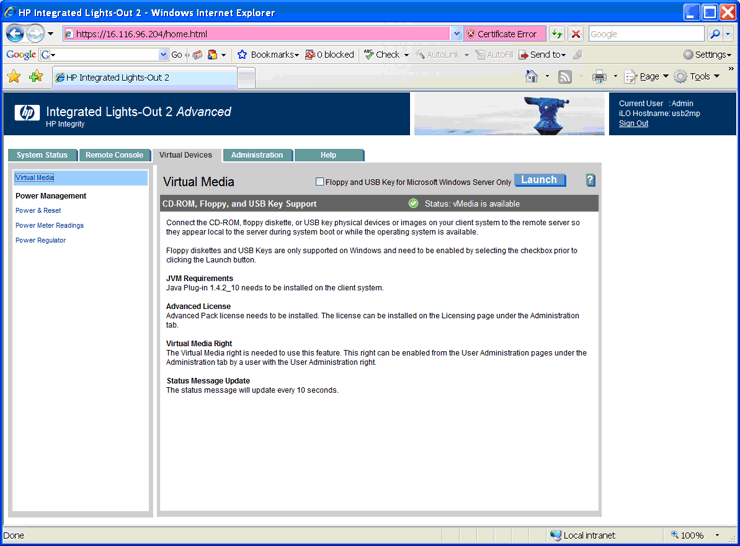
From a browser
on a Windows-based PC or server in the same network as your Integrity
servers, access your Integrity server's iLO 2 MP by specifying
the DNS name or IP address. Then log in as shown in the following
example:
Select the Virtual Devices
tab, then select Virtual Media from the list on the left. If your
Integrity server is not a cell-based system, skip to the next step.
If your server is a cell-based system, select the partition before
launching the vMedia application, as shown:
Now launch
the vMedia application by clicking Launch, as shown
in the following example:
At this point, you might see
popup security warnings, such as the one shown in Section D.1.4. In this case, you
can check the box to always trust content, and then click Yes. (To avoid certification warnings, install valid certificates
for the iLO 2 MP hardware. For more information, see the HP Integrity iLO 2 MP Operations Guide. In addition,
see the online help provided by your browser.)
From the Virtual
CD/DVD-ROM dialog box shown in the following example, make sure the
Local Media Drive option is selected, and then click Create
Disk Image:
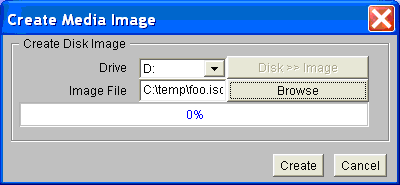
The Create Disk Image dialog
box appears, as in the following example. Specify a path or file name
for the image to be created, and then click Create.
NOTE: As noted previously, HP recommends that you do
not install or upgrade directly from a DVD (on your local Windows-based
management workstation) with vMedia. Creating a disk image on the
local drive (or a network drive) will make the installation or upgrade
much faster. This assumes the local or network drive is accessible
to your Integrity servers over a high-speed network link.
The Virtual
CD/DVD-ROM dialog box appears, as in the following example. Select
the Local Image File option, and then browse for the created ISO image
file that you want vMedia to access. Then click Connect.
The following screen indicates that the image
is connected to vMedia. Now the targeted Integrity server is ready
to be booted using the ISO image file.
At this point, access the
Integrity server's console from a browser or terminal emulator,
log in to the MP, and enter the co command at the
MP main menu:
   MP MAIN MENU:

         CO: Console
        VFP: Virtual Front Panel
         CM: Command Menu
      SMCLP: Server Management Command Line Protocol
         CL: Console Log
         SL: Show Event Logs
         HE: Main Help Menu
          X: Exit Connection

[usb2mp] MP> co
At the EFI Shell prompt, enter
the reconnect -r command to make sure all devices
are discovered:
Shell> reconnect -r
When the EFI Shell prompt
next appears, enter the map -r command to remap
and rebuild the list of known devices that have a bootable EFI system
partition:
Shell> map -r
The following example shows the boot mapping table
displayed by the map -r command. The significant
lines in the table are those that include both USB and CDROM information.
Thus, in this example, fs0 is the file-structured logical partition
on the physical disk to be booted from; it includes the bootable partition,
and blk2 is the block device that has the bootable partition.
Now you can boot the OpenVMS
Integrity servers image, either using the EFI boot menu or the following
command at the EFI Shell prompt:
Shell> fs0:\efi\boot\bootia64.efi
As shown in the following example, the OpenVMS
displays several messages followed by the operating system menu. You
can now begin the installation or upgrade of OpenVMS on the Integrity
servers.
NOTE: The %SYSTEM-I-MOUNTVER messages and the Universal
Serial Bus Configuration Manager message are new to OpenVMS Version 8.4
and are seen only when using USB or vMedia devices for booting the
Integrity rx2660, rx3600, and rx6600 servers.
   .
   .
   .
   .
    Installing required known files...
%RUN-S-PROC_ID, identification of created process is 00000024
  %SYSTEM-I-MOUNTVER, DNA0: is offline.  Mount verification in progress.

  %SYSTEM-I-MOUNTVER, DNA0: has completed mount verification.

Universal Serial Bus Configuration Manager, Version V2.1 Reset Unconfigured devices

    Configuring devices...

%PKA0, Copyright (c) 2001 LSI Logic, PKM V1.1.01  Chip LSISAS1068
%PKA0, LSISAS1068 firmware version is 1.16.0.0
%EWA0, Auto-negotiation mode assumed set by console
%EWA0, Merl5704 located in 64-bit, 66-mhz PCI-X slot
%EWA0, Device type is BCM5704C (UTP) Rev B0 (21000000)
%EWB0, Auto-negotiation mode assumed set by console
%EWB0, Merl5704 located in 64-bit, 66-mhz PCI-X slot
%EWB0, Device type is BCM5704C (UTP) Rev B0 (21000000)
%EWA0, Link up: 100 mbit, full duplex, flow control (txrx)
%EWB0, Link up: 100 mbit, full duplex, flow control (txrx)

    ****************************************************************

    You can install or upgrade the OpenVMS I64 operating system
    or you can install or upgrade layered products that are included
    on the OpenVMS I64 distribution media (CD/DVD).

    You can also execute DCL commands and procedures to perform
    "standalone" tasks, such as backing up the system disk.

    Please choose one of the following:

        1)  Upgrade, install or reconfigure OpenVMS I64 Version X8.4
        2)  Display layered products that this procedure can install
        3)  Install or upgrade layered products
        4)  Show installed products
        5)  Reconfigure installed products
        6)  Remove installed products
        7)  Find, Install or Undo patches; Show or Delete Recovery Data
        8)  Execute DCL commands and procedures
        9)  Shut down this system

Enter CHOICE or ? for help: (1/2/3/4/5/6/7/8/9/?)
NOTE: After an installation finishes, you must register all licenses
for use of the operating system and any installed layered products.
For information about registering licenses, see Section 7.3.
After the installation or upgrade finishes, you can change responses
that you made to the installation or upgrade script and perform any
other postinstallation or postupgrade tasks. HP recommends
that you specify a new SYSTEM password rather than using the default.